
Quite recently, many users have complained about a Spybot error. The error is called the ‘A Problem Has Occurred in BitDefender Threat Scanner’ error. Every time you shut down or restart your computer, this error message displays on your computer screen.
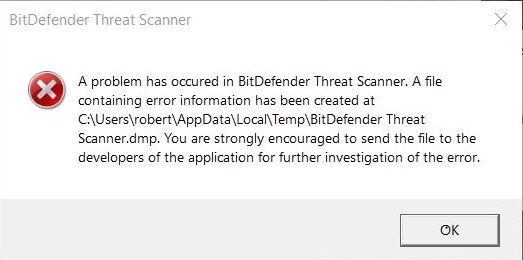
It says: “A problem has occurred in the BitDefender Threat Scanner. A file containing error information has been created at C:\Windows\TEMP\BitDefender Threat Scanner.dmp. You are strongly encouraged to send the file to the developers of the application for further investigation of the error.”
This popup message shows an unreadable file and then prompts to restart your computer. The primary reason for this error is a corrupted Spybot dll file. To add to this, you may encounter this error even if you don’t have BitDefender as your antivirus software. Since many other antivirus programs such as Tencent, TotalDefense, VirusChaser, PSafe, and nProtect, among other programs, use BitDefender’s antivirus scan engine.
In contrast, some use it as an addition to their own, and you don’t need to have the BitDefender Antivirus Application to encounter this error. Nevertheless, here are three ways to get rid of the A Problem Has Occurred in BitDefender Threat Scanner error.
3 Ways to Fix A Problem Has Occurred in BitDefender Threat Scanner
Method 1: Run the Patch
A patch is a software update code that can be inserted into the code of an executable application. It is installed into an existing software application. Also, it acts as a temporary fix for bugs, installs new drivers or upgrades to the application. Running a patch file in accordance with your computer specifications may just get you rid of the issue, and since this issue has been known now, BitDefender has already developed a patch to fix it. To run the patch, follow the steps-
Step 1: Firstly, you need to find the operating system version on your computer. For doing that, run command prompt as administrator.
Step 2: Type the following command and press enter: ‘wmic OS get Caption, CSDVersion, OSArchitecture, Version.’
Step 3: All the information related to your computer operating system will be displayed in the command window.
Step 4: Now, you can download the patch accordingly:
If you use a 32-bit OS then click here.
or
If you are using a 64-bit OS then click here:
Also Read:
- Unable to initialize Steam API
- Kmode Exception Not Handled
- NVIDIA Display Settings are Not Available
Method 2: Fixing Corrupted File
As mentioned before, A Problem Has Occurred in BitDefender Threat Scanner error is a result of a corrupt Spybot unreadable dll file. Therefore, to get rid of the issue, we can also try to fix the corrupt file.
Step 1: Go to the File Explorer of your computer.
Step 2: To find the target corrupted file, type C:\Program Files (x86)\Spybot – Search & Destroy 2 in the address bar in the file explorer.
Step 3: Navigate to the file named SDAV.dll.
Step 4: In case you are unable to find the file go to the given URL to download it from here.
Step 5: After that, copy the file after downloading.
Step 6: Navigate to the Spybot – Search and Destroy folder, the one you located earlier.
Step 7: When you paste the file, if it seems to be already present, check its size.
Step 8: If the size turns out to be anything other than 32kb, then download the file from this link.
Step 9: Now, you can replace the existing SDAV.dll with the one you downloaded.
In most cases, this method seems to solve the A Problem Has Occurred in BitDefender Threat Scanner issue, but if you still encounter the error, move to method three.
Method 3: Reinstall BitDefender
A major reason for this error can be the corrupted dll files. Reinstalling the BitDefender application is a plausible option to get rid of this error. Even many of its users admitted that the error had been eradicated by reinstalling the application, and hence this method is worth giving a shot. To reinstall BitDefender, follow the given steps-
Step 1: Go to the apps and features by right-clicking on the Start menu.
Step 2: Now navigate to the BitDefender application from the list of items displayed. Double click on the application and then follow the on-screen instructions to uninstall the program.
Step 3: Alternatively, you can go to the programs and features from the Control Panel and then right-click on the BitDefender application and then click on uninstall, following the on-screen instructions.
Step 4: Now download and install BitDefender from its official website, and this should fix the error.
Read More:
- Windows Has Detected An IP Address Conflict
- Error Code 0x8007000D
- Downloading… Do Not Turn off Target
Conclusion
Although it would not take anything more than the above-listed steps to eliminate the A Problem Has Occurred in BitDefender Threat Scanner error, there are other ways to get rid of the issue as well. One such method is by using repair tools. There are many tools such as Fix Win 10, Windows Repair, and IOBit Driver Booster, among others, that also might be able to tackle the issue and eliminate the problem without having to use any of the above steps. Note that all the above-listed tools are best to use for Windows 10.


