
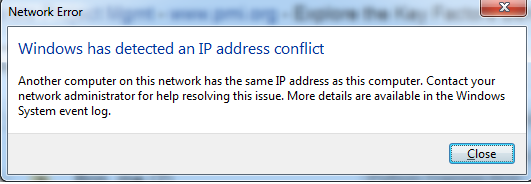
When we are connected to a network such as a router or a LAN, different devices connected to the network are assigned different IP addresses. It is just to give them a unique identity for the network to differentiate between them. If two devices are assigned the same IP address, your computer displays a ‘Windows has Detected an IP Address Conflict’ error.
Sometimes you may encounter Windows Has Detected An IP Address Conflict error even if yours is the only device connected to the server since it can be a glitch in your PC settings or the router. The conflict in the IP address can result in complications when connected to the network, thereby making it necessary to deal with the problem as soon as you encounter it and eliminate it. Here we discuss five ways to handle and eradicate the issue.
How to Fix Windows Has Detected An IP Address Conflict Error
Method 1: Release and Renew IP Address
This method is very much like shutting down your system and then restarting it whenever it hangs; it may be old, but it works, and when it comes to issues relating to network or IPs, this method comes in handy. In this method, we use the command prompt to get your router to assign you a new IP and hence resolve your error. To renew your IP, follow the given steps.
Step 1: Type in ‘Command Prompt’ in the search bar in your computer and then right-click on it and select ‘Run as administrator.’
Step 2: Now, first type the command ‘netsh int ip reset c:\resetlog.txt’ and hit Enter.
Step 3: Now, you need to release your current IP address. To do so, type the following command ‘ipconfig/release’ and hit enter.
Step 4: To renew your IP address type in ‘ipconfig/renew‘ and hit enter.
It should most probably fix the Windows Has Detected An IP Address Conflict error, and you can surf the internet again. If not, you can see the next method.
Method 2: Restart the Router
It isn’t always necessary that the problem lies in your computer settings. It is equally plausible that your router has assigned you an inappropriate IP address, and that is the reason for the error. This can be a result of a temporary glitch, but if this is the case, it can be cleared by a simple reboot or a power cycle. To reboot your router, follow the given steps.
Step 1: Find the power button of your router.
Step 2: Press the Power button and turn off your router and wait for a couple of minutes.
Step 3: Now again, press the Power button to switch the router on.
Step 4: Now connect your computer with the router to see if the Windows Has Detected An IP Address Conflict issue has been resolved.
Read More:
- Dragon Age Inquisition Won’t Launch
- Unexpected Store Exception
- Discord Screen Share Audio Not Working
Method 3: Eliminate the Static IP
A Static IP address is a permanent number assigned to a computer by a router or an internet service provider (ISP). However, having a static IP may also indicate that the address your computer uses, was entered and configured manually. Having your IP manually configured is not as good as having it automatically assigned by the router, and it might result in the ‘Windows has Detected an IP Address Conflict’ error. To eliminate the static IP, follow the given steps.
Step 1: Press Windows key + R to open the Run dialogue box.
Step 2: In the Run dialogue box, type ‘ncpa.cpl‘ and press enter. A Network Connections windows appear before you.
Step 3: In the Windows before you, right-click on the Local Area Connection and go to properties.
Step 4: In the new Properties windows, double click on IPv4 (Internet Protocol version 4). Now choose ‘Obtain an IP address automatically’ and ‘Obtain DNS server address automatically.’
Step 5: Now click on the OK option and then restart your computer. You will find the error is resolved. If not, then you can go for the fourth method.
Method 4: Disable IPv6
The most recent version of IP is Internet Protocol version 6. It is the communications protocol furnishing a unique identification and location system to computers on networks. Also, it is quite recent and can cause the ‘Windows has Detected an IP Address Conflict’ error. You should use this method if all others fail; it can still help to eliminate the error. To disable IPv6, follow the given steps.
Step 1: Press Windows key + R to open the Run dialogue box.
Step 2: In the Run dialogue box, type ‘ncpa.cpl’ and press enter. A Network Connections windows appear before you.
Step 3: Right-click on the Network adapter that you are using and select properties.
Step 4: In the Networking tab, remove the tick from Internet Protocol version 6 (IPv6). Now you have disabled IPv6.
Step 5: Now restart your computer and see if the Windows Has Detected An IP Address Conflict error has been eliminated. If the error persists, go for the final method.
Method 5: Disable and Enable the Network Adapter
A Network Adapter is a computer’s internal hardware component. We use it to communicate over a network. It enables your computer to connect with another computer, server, or any networking device, hence it interfaces your device to the network. Disabling and reenabling the Network Adapter in Windows often helps in fixing the issues associated with wireless connections. Hence this method is worth giving a shot. To disable and enable network adapter follow the given steps.
Step 1: Press the Windows key + R to open the Run dialogue box.
Step 2: In the Run dialogue box, type ‘ncpa.cpl’ and press enter. A Network Connections windows appear before you.
Step 3: Point out the adapter that you are using and then select the ‘disable’ option.
Step 4: Now, you have disconnected the network. After a couple of minutes, again right-click on it and select ‘enable.’
Now restart your computer and see if the Windows Has Detected An IP Address Conflict error has been eliminated.
Also Read:
Conclusion
Without a doubt, any one of the methods mentioned above should eliminate the ‘Windows has Detected an IP Address Conflict‘ error. However, if none of the methods seem to work, you can also try to update your network card driver. As we already know that corrupt and outdated drivers can cause a lot of trouble in your system.
To avoid this issue, you can update your driver from Windows itself using the Device Manager to find a new updated driver. For doing that, you need to type devmgmt.msc in the run dialogue box and go to the Network adapters by clicking on the arrow. From there, you can update your drivers and hope that this method might work in case all else fails.


