
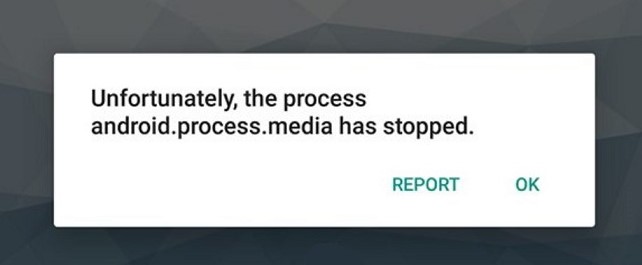
Android.Process.Media Has Stopped a commonly faced problem that takes place anytime. The error occurs mainly due to the use of two applications, the Download Manager and the Media Storage.
Causes of Android.Process.Media Has Stopped Error
There are many reasons for Android.Process.Media Has Stopped error to occur, such as moving from one custom ROM to another, restoring your apps via titanium backup, or a virus attack.
A failed firmware update and failure of some certain applications like the download manager and the media storage are also to be blamed if this error happens to be on your screen.
How to Fix Android.Process.Media Has Stopped Error
In this article, we have brought you some must-try solutions that will most positively solve the issue. Before getting information on all the solutions, you should back up all the data. This will help you restoring data later on when the device is made error-free and if your data has to be sacrificed for that. So, let us get started.
Method 1: Clear Cache & Data
Clearing data stored in the application can help in solving the problem. Follow the steps given below to clear your cache and data.
Step 1: Visit “settings” on your computer. Select the application> manage application and look under the “all” tab. Scroll till you find the “Google services framework”. Then clear cache and data for this application.
Step 2: After doing that, go back to manage application and find “google play”. Select the option clear cache there too.
Step 3: Go back again, find and select the “Google services framework” from all apps, and then click on force stop > clear cache > OK.
Step 4: Open google play on your device from app drawer and when the error appears. Click on OK
Step 5: Shutdown/ restart/ reboot your device but holding the power button.
Step 6: When the device turns back on, go back to the application manager, and turn back on the google services framework. Check whether your issue has solved or not. If it still prevails, then try other methods.
Method 2: Resetting App Preferences
Step 1: Go to the settings of your device.
Step 2: Search for “Applications” or “Application Manager”. Different phones/ devices have different options.
Step 3: A list of all your applications will be displayed on your screen. Without touching anything, look for the menu. Most of the phones have the menu option on the upper right side while some others have the menu button.
Step 4: Find the option “Reset App Preference”. Select that option and check for the problem again.
Method 3: Clearing Contacts and Contact Storage
This method may lead to the deletion of all your contacts, so it is advisable to create a backup somewhere. Many people do not know and have problems while syncing their contacts with google.
You may feel it’s nothing that important but sometimes it creates problems with your devices. So, follow the steps listed below and let us see if we are able to solve your problem through this method.
Step 1: Go to the settings of your device.
Step 2: Search for “Applications” or “Applications Manager”. Different phones may have different options.
Step 3: When all your applications are listed on your screen, search for “Contacts”. When you will find it, select it.
Step 4: In the following window, find and chose the option “Storage“.
Step 5: Select “Clear data” and “Clear cache”. Now you are good to go.
If you still are facing the problem, we got two more methods for you. Try those too.
Method 4: Disabling the Media Storage
Step 1: Open settings of your device
Step 2: Browse for the option “applications” or “application manager”. Different phones may have different options.
Step 3: Click on the options on the top right corner and select “show system”. This will show you media storage from the whole list of applications if it was not visible before.
Step 4: Select the “media storage” application from all the variants listed below.
Step 5: Click on the disable button which will disable your application.
Method 5: Check Google Sync & Media Storage Settings
Last but not least the problem-solving method is checking google sync and media storage settings. To continue with this method, you have to make sure that all your pictures and videos are backed up somewhere. If your content is all backed up, follow the steps given below.
Step 1: The foremost step is to step the google synchronization. For this, you have to go to settings > accounts, and personal > google syncs > uncheck all the checked boxes.
Step 2: Now disable and clear all the media storage data for which you have to visit settings > apps > all apps > find the media storage > clear cache > disable.
Step 3: The next step is to repeat the same second step with the download manager. You have to disable and clear data from there too.
Step 4: Now turn off your device and after a few seconds, turn it back on
Step 5: We are almost positive that now the error will not appear.
To make your device’s working the same as before, don’t forget to turn on download manager and google sync.
Similar Sites:
Downloading Do Not Turn off Target
Conclusion
Don’t panic when the error appears on your device. It is a fairly mild issue and can be solved using one of the methods listed above. And if everything fails to solve the error, the factory reset your device, and your device will be restored to its original form. But do not forget to back up all your content before doing so.


