
A lot of people are complaining about a problem while upgrading to Windows 10. The problem is Modern Setup Host Has Stopped Working error. Though Microsoft has no official fix for Modern Setup Host Has Stopped Working problem it is definitely solvable. Modern Setup Host or SetupHost.exe is a self-extracting archive and installer.
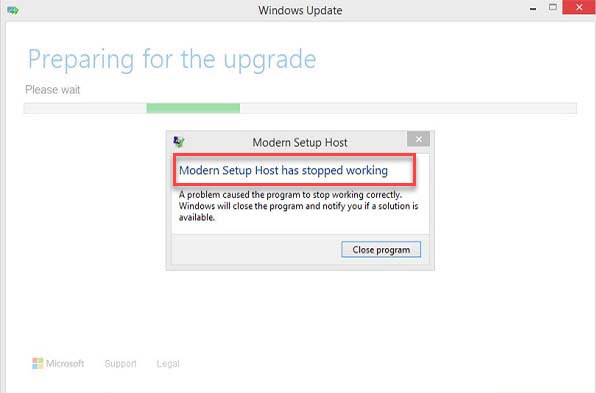
It is present in C:/Windows.~BT/Sources/ Folder. It runs whenever a user logs in to execute a task with local user privileges. This is a must when you will upgrade to Windows 10. If this fails you see this error and the up-gradation stops.
You should take precautions before using the updater. Sometimes due to insufficient space, the update stops. Remove all the third-party applications as it might restrict the upgrade. Even you can remove the unnecessary external devices.
You can boot into a new operating system in a few ways namely using bootable USB or DVD, Using the Windows Updater tool, Using Media Creation Tool. Modern Setup Host Has Stopped Working error can occur due to a number of reasons. The wrong configuration in PC, the problem with hardware can be a probable reason.
You can solve this problem by following any of the methods given below.
Method 1: Check free Hard Drive space
Lots of people don’t have the amount of hard disk space to upgrade. For upgrading to the new version of Windows you must have free hard disk space. You need about 20 GB of free hard disk space for the new update. The normal Windows needs 8 GB space. But with Windows comes a lot of applications and other softwares that take the space. So you must remove unnecessary data from your PC to free space.
You can free space using the following ways:
1. Remove the unnecessary applications, movies, etc from your pc.
2. Back up your data in the cloud or in an external USB.
Check if this solves the problem or else proceed to the next solution.
Check Out:
- ERR_EMPTY_RESPONSE or No Data Received Error
- Err_Cache_Miss Error in Google Chrome
- DPC Watchdog Violation BSOD Error in Windows 10
Method 2: Prepare Windows Machine for Upgrade
In this method, we make some changes to the system. You will disable some of the services and change your settings. By this method, we remove some problems that may interrupt while updating. We start with disabling services that are not from Microsoft.
The method is applicable on Windows 8, 8.1 and 7 respectively. Follow the steps below to solve your problem:
Step 1: Open Run dialog box by pressing Windows+R in the keyboard simultaneously.
Step 2: In the dialog box write msconfig and press Enter.
Step 3: Open System Configuration and click in the Services tab.
Step 4: Tick the Hide all Microsoft services present at the left of the screen. Now select Disable All option at the right bottom corner.
Step 5: Click on Apply, then OK, thus this will make the changes take effect.
Now for changing the time and location Settings in Windows 8 and 8.1 users:
Step 1: Press the Windows Button. Now type Control Panel and open the Control Panel.
Step 2: View by Category and click on Clock, Language, and region.
Step 3: Go to the region and select the Location Tab. Select the United States from the Home option.
Step 4: Select Apply and press OK.
Step 5: Now or adding Language select the Language option. Click on Add a language, select English(United States) and click on Add.
Step 5: Close the Control Panel and restart your PC.
Step 6: Now upgrade to Windows 10 and enable the third party services.
The method is the same for Windows 7, there is a slight difference in Step 5. For changing the language you have to select the Keyboard and Languages tab. The rest is the same.
Though this is a lengthy process, it is definitely worth your valuable time. If this is not the solution you seek to proceed to the next solution.
Method 3: Create a Bootable USB and Upgrade Your Machine to Windows 10
In this process, you upgrade your PC using a Bootable USB. You need to flash the .iso file of Windows 10 in your USB. For this, you can use the PowerISO application. It has a direct option to create a bootable USB. After flashing Windows, you need to open the BIOS. Here you have to select the Boot priority of the USB. Now your PC will boot from USB. Just insert your USB now and follow the steps as given to install Windows 10.
This is definitely the best method to solve the problem. But even if this doesn’t solve the problem move to the next method.
Method 4: Run Disk Cleanup and delete $Windows.~WS Folder
IN this method you run the disk cleanup. Now you delete the $Windows.~WS folder from your system. Disc cleanup removes the unnecessary files present in your system and increases the speed of your machine.
Now when you upgrade your Windows to Windows 10 you will have two hidden folders. These folders will be present in the drive where you already have Windows. One of those folders will be the $Windows.~WS folder. Select the folder and permanently delete that. Removing this folder from your hard disk can definitely solve your problem.
If you still face the problem move to the next option.
Method 5: Resume Upgrade by Running setupprep.exe
IF you need an easy solution this is it. This solution will help you solve the problem without much effort. Starting and running setupprep.exe will resume the last operation of the update. Rather than starting it from new you can just resume the old process.
It is compatible with Windows 7, 8 and 8.1. Follow the steps below to use setupprep.exe:
Step 1: Use Media Creation Toolkit to start a Windows upgrade.
Step 2: Close the Windows Update if you get an error or continue.
Step 3: Open the Run dialog box using Windows+R. Now type C:\$Windows.~WS\Sources\Windows\sources\setupprep.exe and press enter.
Step 4: This will resume your Windows Update. Once the update is complete restart the tour machine to make the changes.
Sometimes in this method, people get an error. If this method solves your problem then its fine. If not move to the next solution.
Method 6: Run System File Checker
System File Checker is a command-line utility. It comes with Windows and it checks files for corruption. IF the SFC finds some issues with Windows files it will fix them. For using SFC the only prerequisite is that you need administrator privileges.
SFC has a lot of utilities, one of them is namely SCANOW. SCANNOW scans for corrupts files and repairs them. So, running SFC is a valid option to solve your problem. If not then move to the next solution.
Method 7: Install or Upgrade Graphics Driver
Sometimes the Graphics Driver is at fault. Install the graphics driver if not present. If already present then upgrade it or try reinstalling it.
Install the latest graphics driver after downloading them. This will definitely solve Modern Setup Host Has Stopped Working problem. If the problem still persists move to the next option.
Method 8: Move User Folder to Default Location
Sometimes while playing with your computer one may move the User folder to another directory. This can cause a serious problem and interrupt you from updating Windows. If the User profile is at another location follow this. If this is not the problem move to the next solution.
If your user profile is not in the correct position follow this. You have to move your user profile to its original location. Locate the YourUserProfile folder and move it to C:\Users\YourUserProfile. If the upgrading software can’t detect your system profile it will stop upgrading. So try to resume the update after restoring it to its original location.
If this is not the solution you need to move to our final option.
Method 9: Clean Install Window 10
Rather than following all the solutions before this one is the best one. Try installing Windows 10 directly rather than updating it. Check your motherboard, ram capacity. HDD space, computer brand, etc. After installing the Windows you will need the drivers. You can get your drivers from the official site of your computer brand.
Make a list of all applications that you already have or want to install. Installing Windows in this way will format all the data. Moreover, back up your important documents or any other file.
Now when you are ready to make a bootable USB and boot from that USB and install Windows. This is the last option when none of the above works. But this solution has no drawbacks. While others may fail or show error this will always execute properly.
Also Read:
- ERR_CONNECTION_TIMED_OUT Error in Chrome
- Ethernet Doesn’t Have A Valid IP Configuration Error
- Err_Connection_Reset Error in Google Chrome
Conclusion
All the solutions are working and at least one will go with your system. This is not a problem but rather every system has different requirements. You just need to find out the solution for your particular system. Every time a new update rolls out people want to experience the new version. Follow the right steps and you will get the new version of Windows in your machine.
Contents
- 0.1 Method 1: Check free Hard Drive space
- 0.2 Method 2: Prepare Windows Machine for Upgrade
- 0.3 Method 3: Create a Bootable USB and Upgrade Your Machine to Windows 10
- 0.4 Method 4: Run Disk Cleanup and delete $Windows.~WS Folder
- 0.5 Method 5: Resume Upgrade by Running setupprep.exe
- 0.6 Method 6: Run System File Checker
- 0.7 Method 7: Install or Upgrade Graphics Driver
- 0.8 Method 8: Move User Folder to Default Location
- 0.9 Method 9: Clean Install Window 10
- 1 Conclusion


