
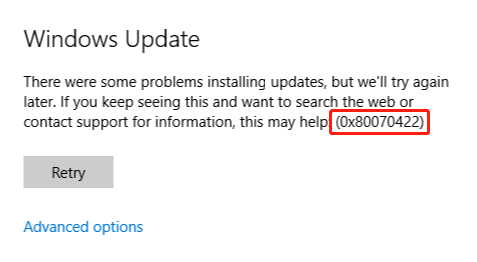
Generally, Error Code 0x80070422 prevails in Windows 10 and occurs when you update your Operating System into the new version. As we know, Windows frequently provides its users with updates with various explicit features. Still, sometimes, when you are updating Windows, you get an update error 0x80070422, where a tab appears stating that ‘There was a problem in updating Windows. Please try again.’
We know that people many times try to ignore these errors and not fix update error 0x80070422. Still, it is better to fix this problem immediately so that you won’t face these issues frequently and can update your device quickly and without facing any hindrance. update error 0x80070422 is caused by entering the configured data incorrectly in the Windows registry, which sometimes causes to occur the error frequently.
How to Fix Windows 10 Update Error 0x80070422
In this article, we would provide you with solutions that could help you to deal with error code 0x80070422. Methods provided here are beneficial and simple to apply, and it won’t take a long time to fix update error 0x80070422. So, stay tuned to the article, which you help to overcome the error.
Method 1: Start Windows Update Service
The next method on the list is to Start Windows Update Service in your device. Windows Update Services is the one that allows your device to locate any update for your device and then handle all the processes behind it. It is essential for your device that update service should be running correctly to avoid 0x80070422 error. The following steps will guide you to check update service and set the Startup type to automatic.
Step 1: Click on Windows and the open Run tab.
Step 2: Over there type the services.msc and then click OK.
Step 3: After that, a new window appears containing various services in the command. From there, look for Windows Update and double click it.
Step 4: A new tab appears where you have to change startup from disable to
Step 5: After that, check on the status of Windows Update and start if it isn’t already.
Step 6: Click on Apply and click, OK.
Step 7: After all the process, check whether your device is updating without any error.
Method 2: Make Sure the Related Services Are Running
The first method in the list is to check the services in Windows as we know that Windows bestow numerous services that help in the working of the system. All these services are equally important if you want your system to work and update efficiently, and for that, it is very vital that these services are constantly running.
If some service isn’t running in your system, then you can run them manually by following some simple procedures that would help you to overcome these errors. The following steps will guide you to run these services properly in your device.
Step 1: Click on Windows and the open Run tab.
Step 2: Then type the services.msc and then click, OK.
Step 3: After that, a new window appears containing various services in the command. First of all, find service Network Connection and then look in status if it is Running if not right-click on it to Start it.
Step 4: After that, look for service Windows Defender Firewall. It must be Running like the previous one, and if not right click on select Start.
Step 5: Then look for DCOM Server Process Launcher and check if it is Running. If not, apply the same procedure to Run it.
Step 6: Now, at last, look for BitLocker Drive Encryption Service. It must be running and, if not, run it manually.
Step 7: After these processes, Restart or refresh your device and update it without any error.
Method 3: Disable IPv6
The next method in our list is to disable IPv6. IPv6 is referred to as an Internet Protocol and is responsible for providing and accessing the location of a network of your system. IPv6 plays an essential part in managing your websites, but sometimes you update your Windows through the official website, and then it may cause the error. So, it is better to disable IPv6 to overcome the Update Error 0x80070422. The following methods will help you to disable IPv6 from your system.
Step 1: Click on Windows and the open Run tab.
Step 2: Over there type CPL and then click OK.
Step 3: Find out the Internet Connection and right-click on it. Then select Properties.
Step 4: Then, you will find Internet Protocol Version 6 (TCP/IPv6) and then Uncheck.
Step 5: Click, OK.
Step 6: Restart your device.
Method 4: Enable/Disable Network List Service
The last method on your list is to enable or disable the Network List Services. Generally, it depends upon your initial state of service to whether to enable or disable these services. If these services are already running in your system, then disable it, and if it is not running, then enable it to overcome the error. The following methods will help you to enable and disable Network List Service in your system.
Step 1: Click on Windows and the open Run tab.
Step 2: After that, type the services.msc and then click OK.
Step 3: A new window appears from there find Network List Service and right-click on it.
Step 4: If startup type shows Manual or Disabled, then change it to Automatic and vice versa.
Step 5: Click, OK.
Also Read:
- Update Error 0x8024a105
- Error Code 0x8007000D
- System Service Exception Error in Windows 10
- The Audio Service is Not Running
Conclusion
All these methods which are described will help you to overcome the Error Code 0x80070422. As earlier mentioned, this kind of error is quite common, so these methods could be handy to deal with them. I hope it helps you.


